
Cherry Pie from Scratch!

This past October my family lost one of its most valued members, my grandfather (Hank) passed away. His favorite pie flavor was cherry, and it was always my intention to write a recipe for cherry pie so I could serve it to him. However, working on that recipe got lost in the shuffle of life, as things tend to do. Now that he has passed, it inspired in me a new urgency to complete it. I have worked for many months on getting this recipe right, and I’ve eaten A LOT of cherry pie, but I think (nay, I know) that I’ve come up with a recipe that is truly worthy of my grandfather. This pie has a big cherry flavor and the perfect balance of sweet and tart. It also has a few flavor surprises thrown in to make it stand out from the crowd. I also, in testing this recipe, discovered a new method of making pie crust that makes the process so much more simple and turns out great results each and every time.

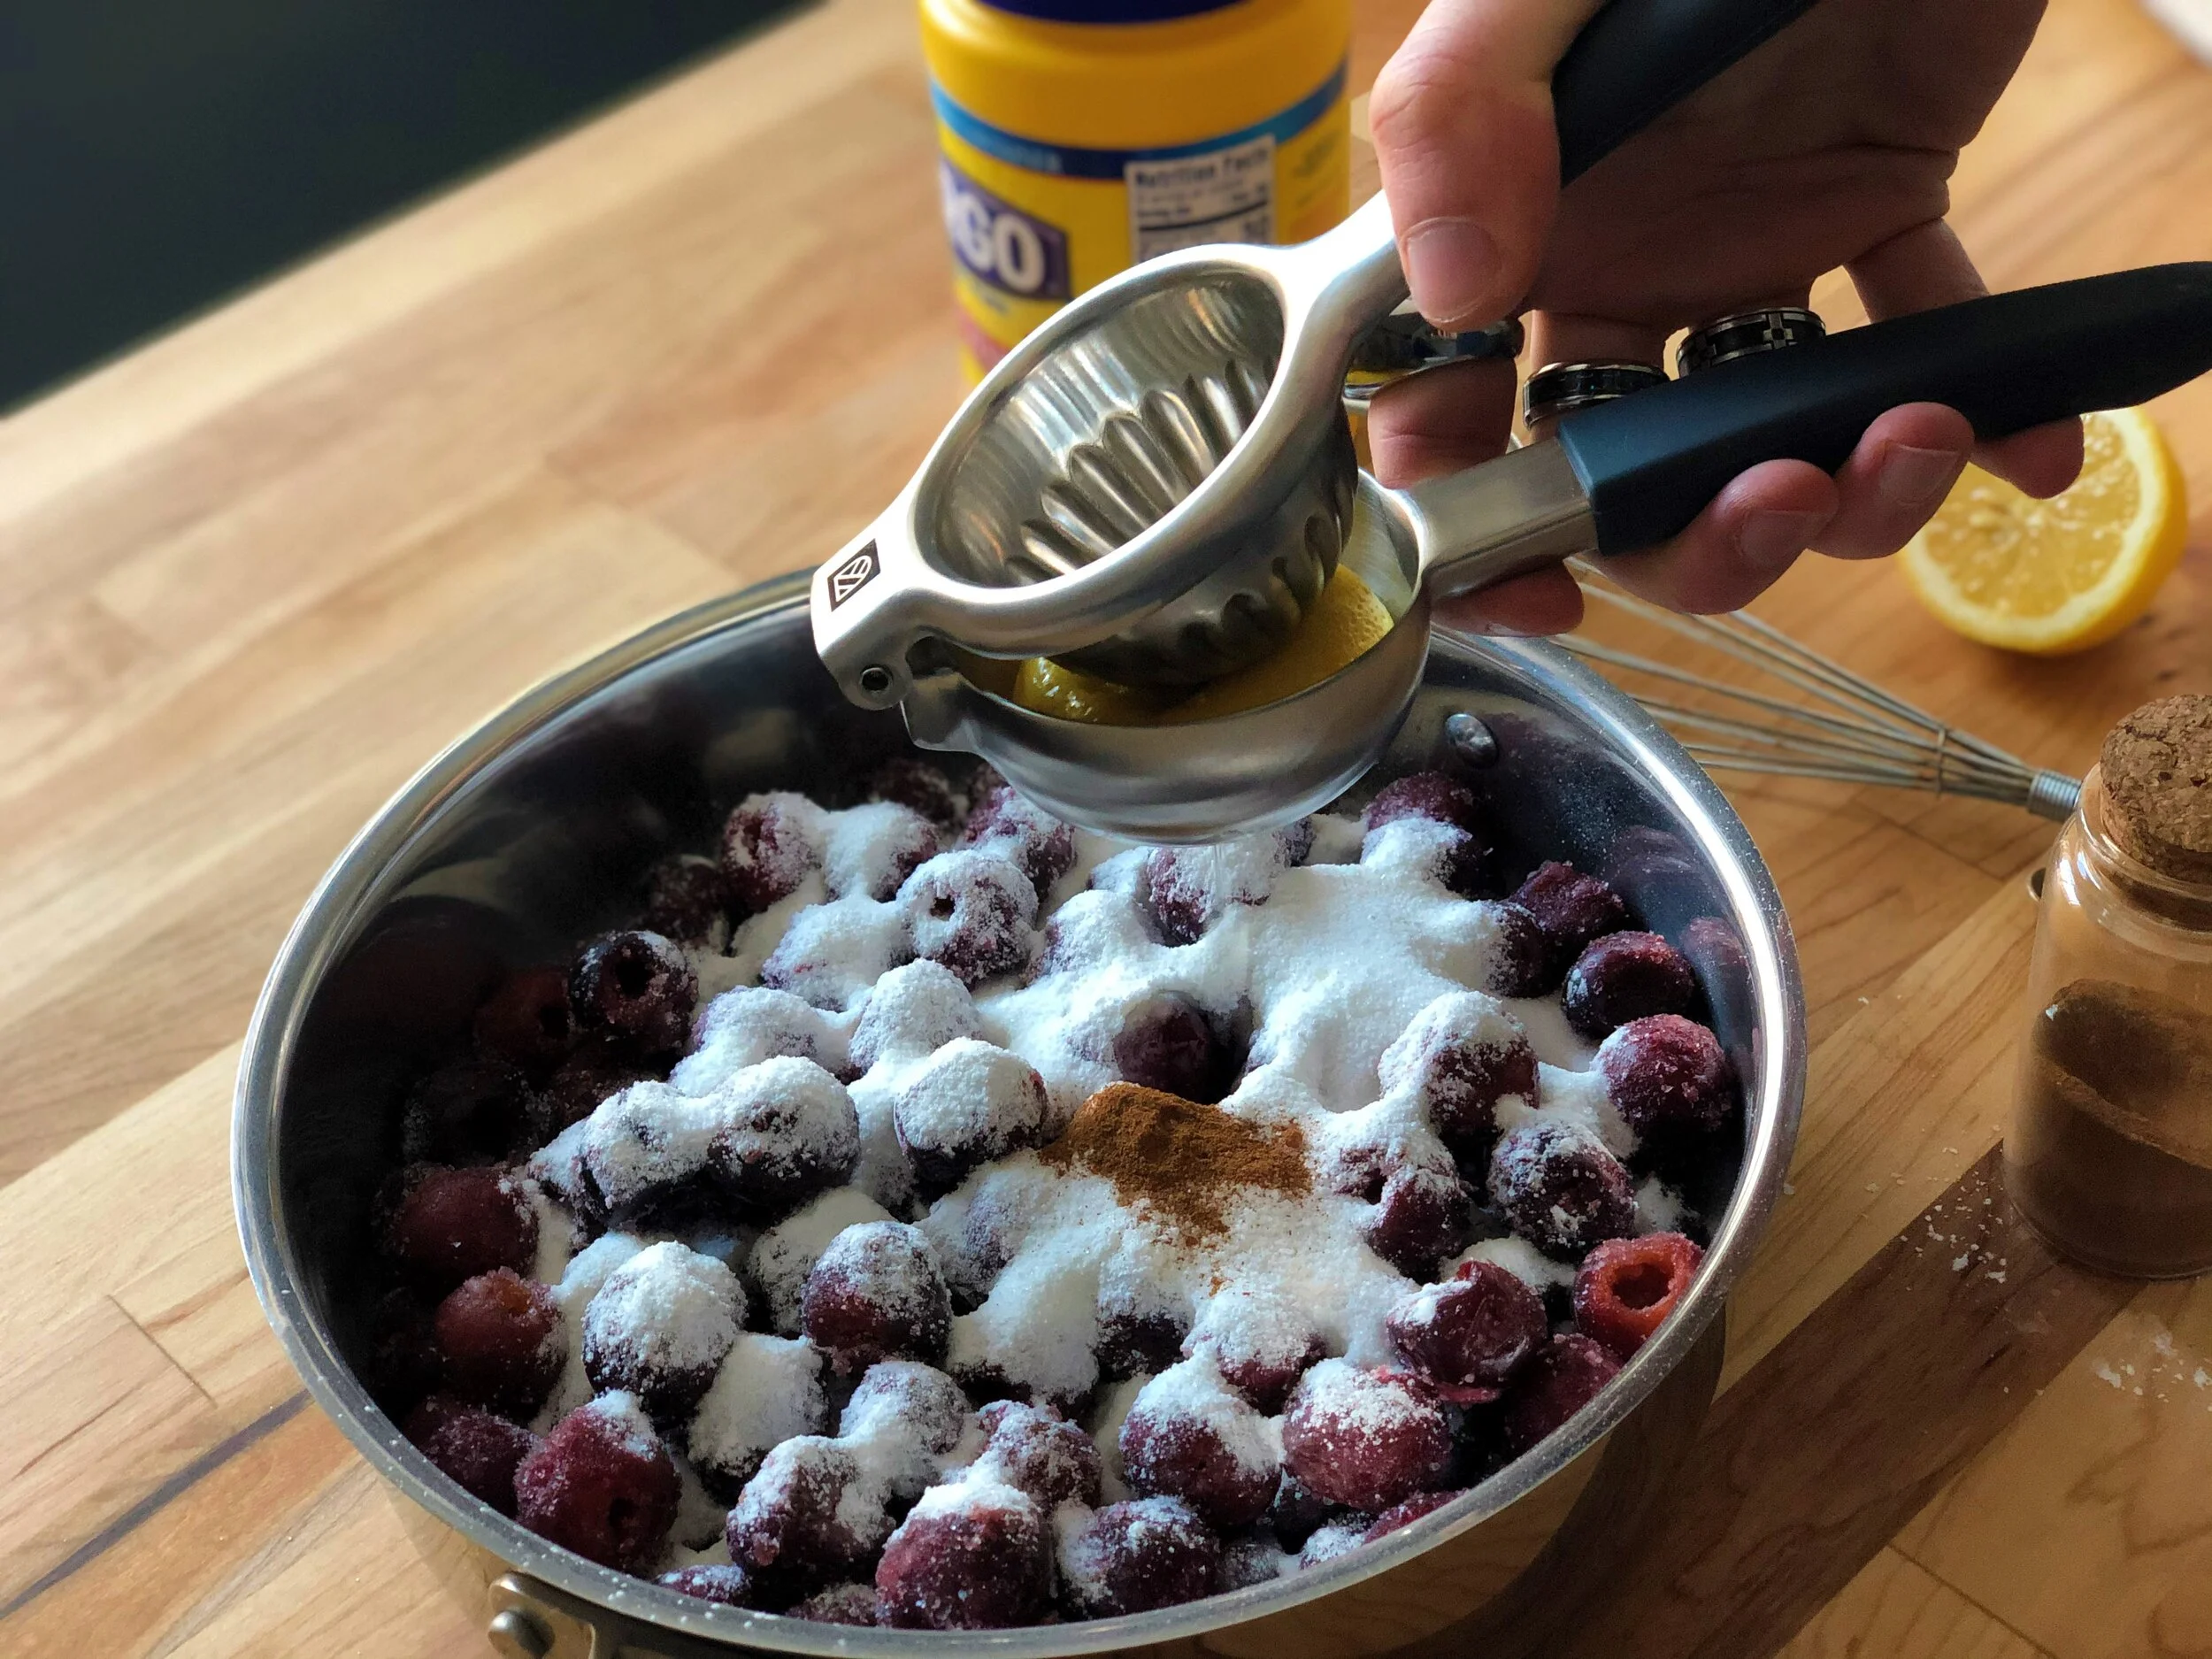
I always start this pie with the filling, which is contrary to most pie recipes. The reason I do this is because the filling needs to cool down before you put it into the pie, and therefore it has plenty of time to do so while I put together the pastry and let it hydrate. There are many fantastic recipes out there which do not cook the filling first, however the type of cherry pie that my grandfather was partial to was those made with canned cherry pie filling. My goal was to try to simulate that without all the preservatives and with PLENTY of cherries (have you noticed they are putting less and less in that can these days?). This filling is made with frozen, dark, sweet cherries. Many cherry pie fillings are made with tart cherries, but in my location they are more difficult to find year-round. So to combat the sweetness of these cherries, I add in the juice of a lemon. This adds just enough sour to turn our sweet cherries into tart cherries. The first flavor trick that I have in the recipe comes in the form of cinnamon. I found that the pies I was making at the beginning felt very cold to me. I wanted a pie that made you feel warm inside and so I got that warmth by adding a literal pinch of cinnamon.

Cooking the cherries off can go south fast, and so you want to make sure you keep an eye on them as they cooking. You want to just thicken them up, not dry them out. The corn starch helps with this, but you don’t want to take it too far so only boil the juices until your spoon starts leaving a trail in the pot when you drag it across the bottom. Then after the filling is cooked we can add our second flavor trick, almond extract. Cherry and almond is a classic pairing and it works so well here. Just be careful not to add too much or it will overpower the pie.


Now to my pastry trick. I saw recently someone in a video (I don’t remember who or I’d give them credit) who grated their butter before adding it to the flour. My eyes were opened. One of my least favorite things about making pie dough is cutting in the butter. Either I had to dirty my food processor (a pain to clean) or I had to work my biceps through with a pastry blender to get the butter incorporated. Then in the end the dough never came out quite right. Since I ditched the special equipment and heavy machinery and started using the box grater, my pies have never been better, and I’ve never enjoyed making them more. Even if you don’t use my crust recipe, I encourage you to try the technique with your recipe as it’s sure to change your life (it did for me).


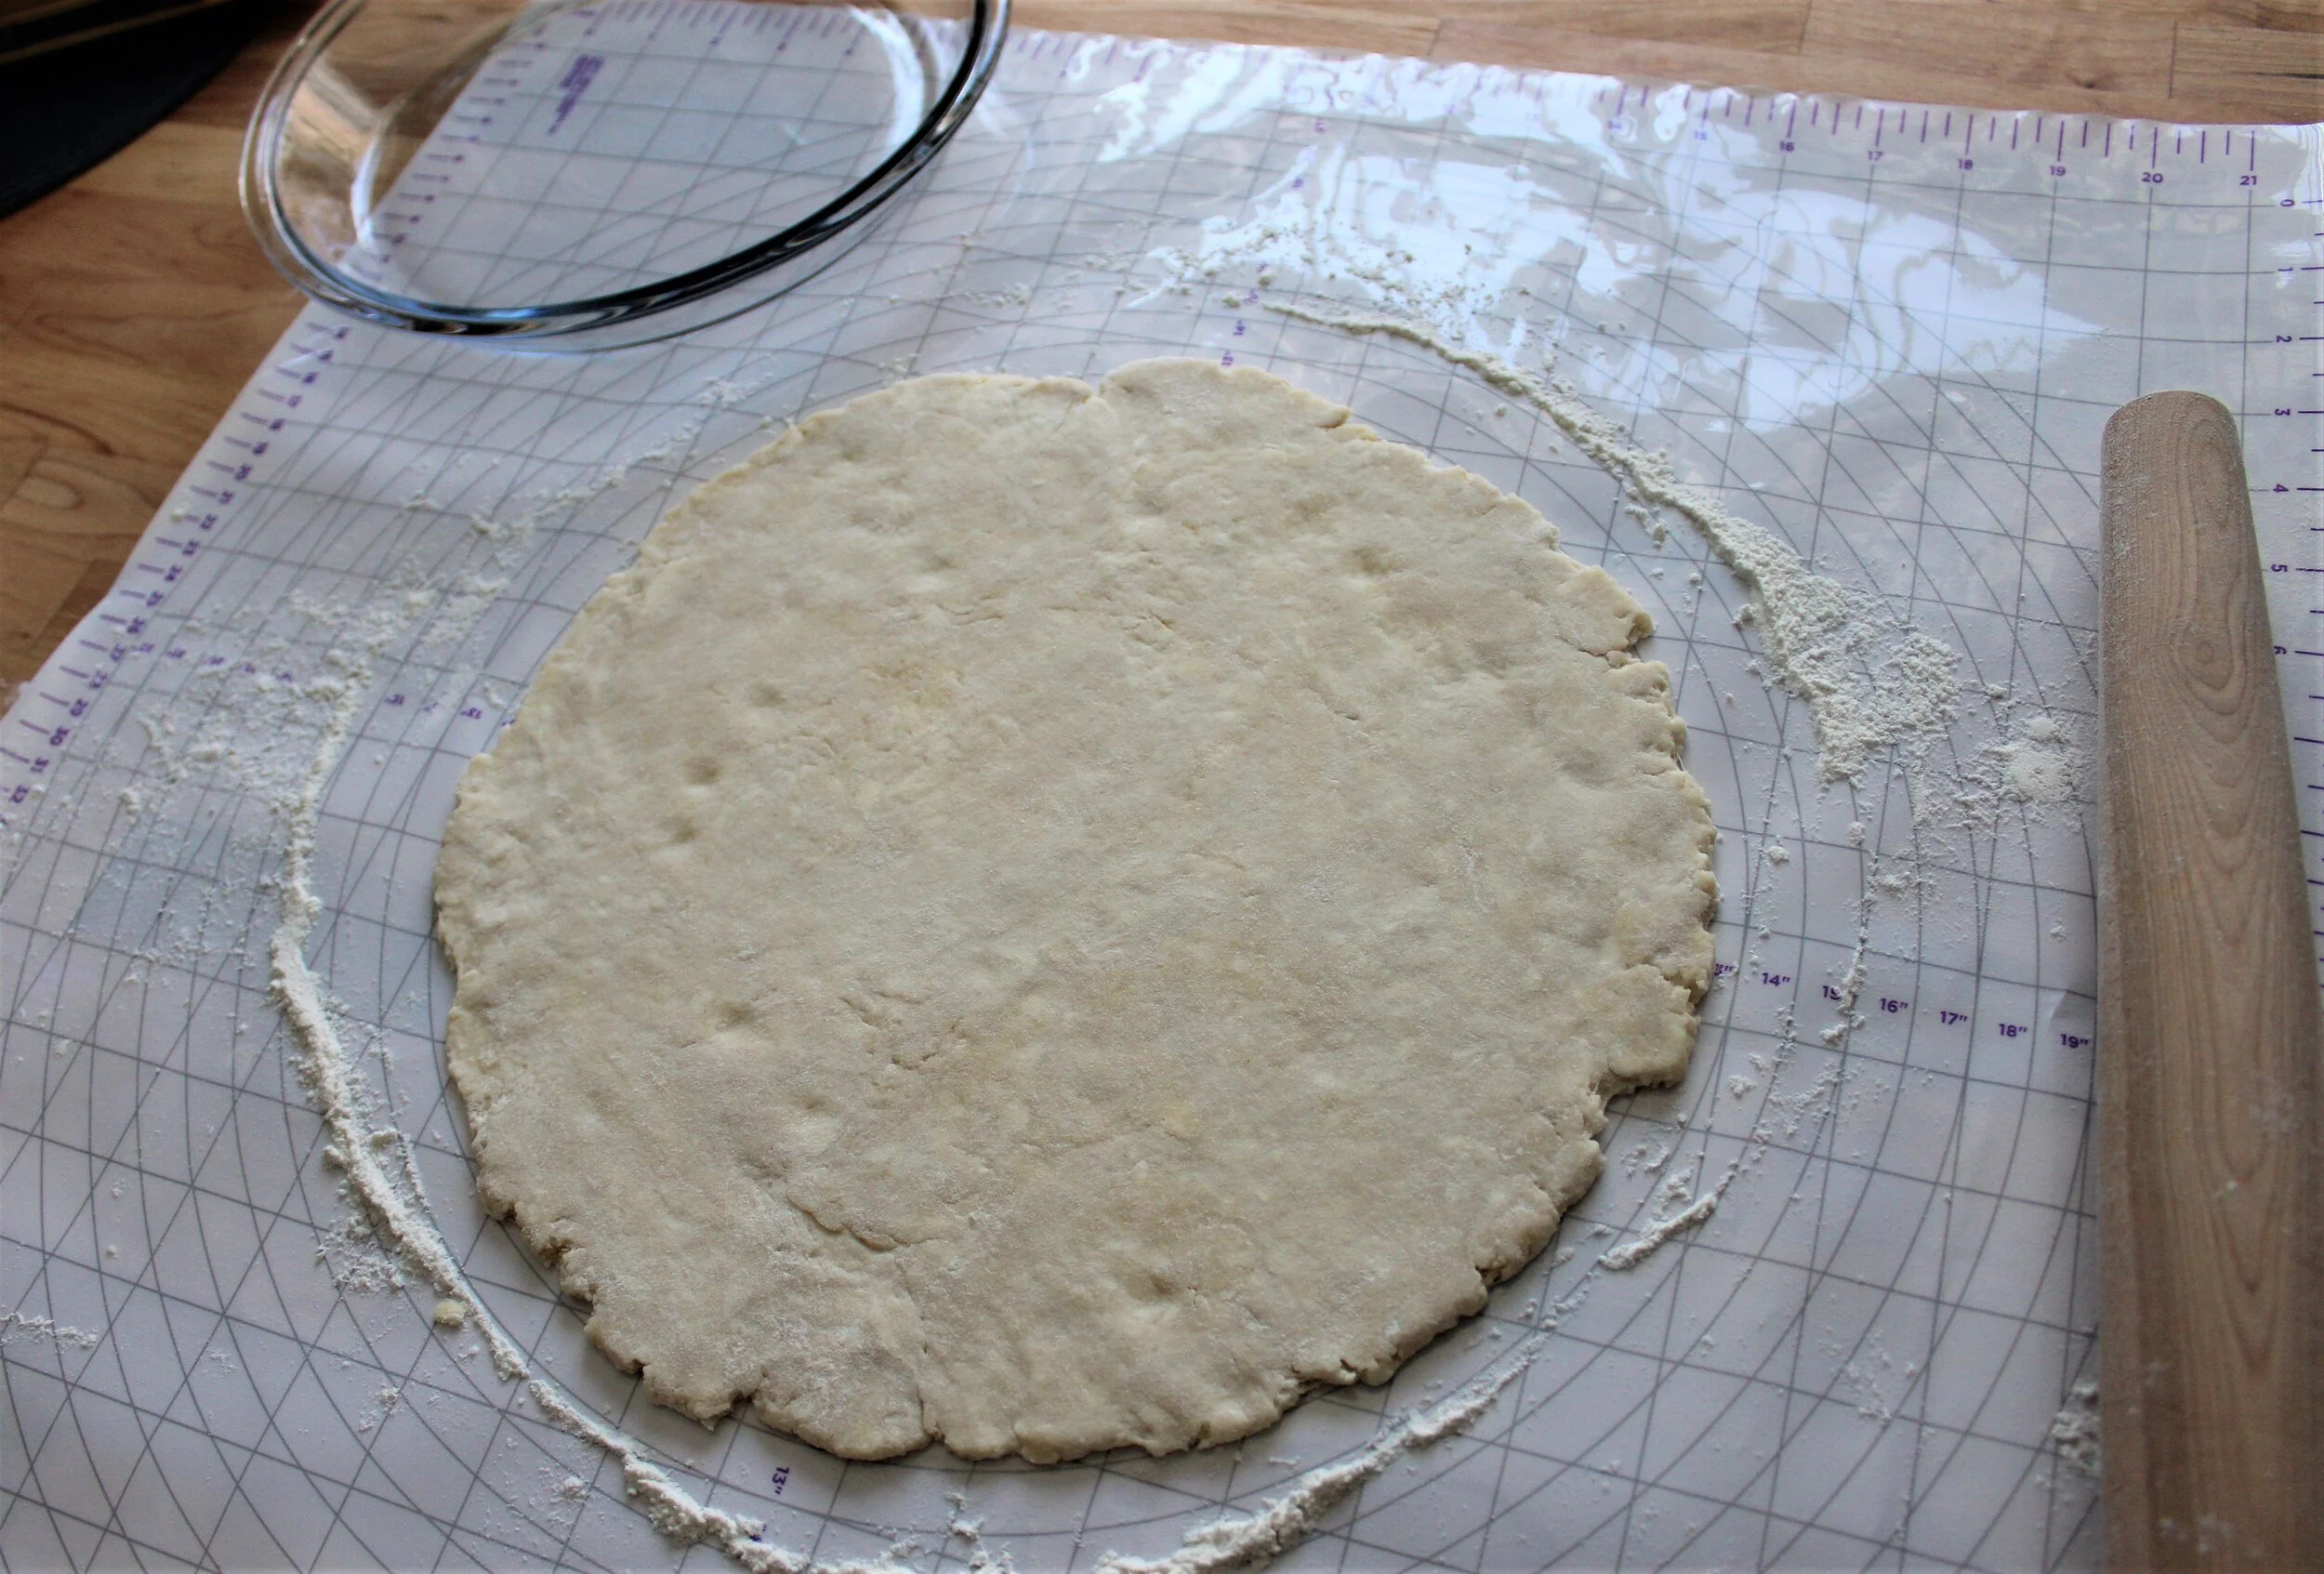
After the pastry has rested, the fun part comes in, the assembly. I like to use this roll-out mat I got from Wilton used for rolling fondant. I like it because of the little inch measurements that let me know exactly when I’ve rolled out the pastry large enough. If you can’t find one, you can easily use a ruler or just guess, but I have found this tool invaluable in making pies quickly. A trick to getting perfectly browned pastry is to make sure you press the dough into the pan well. There should be no spots where the dough is not touching the pie plate.

For the top crust of this pie, I went with something that was simple but looks impressive. Instead of doing a traditional lattice, which takes up a lot of time and patience, I have just cut holes with a one-inch cutter in the top of the pastry to allow for venting. I think the effect is impressive, but it doesn’t take a lot of effort. I also do a simple crimp on the sides of the pie. Since this pastry is so flaky, most of my crimp ends up disappearing by the end, but it still adds a nice scalloped edge. Another secret to great pies is to make sure tot put your finished pie in the freezer for 15 minutes before you bake it off. This helps to set the pastry before it goes in the oven and hold its shape better.


The last thing I do before putting the pie in the oven really isn’t necessary, but I really enjoy it. I use a pastry brush to brush a little milk on the surface of the pie. This will help with browning the crust beautifully. I also sprinkle some extra sugar on top to add a little extra crunch and sweetness to the finished pie. To bake the pie, I always preheat my oven with a sheet pan on the bottom rack of the oven. Setting your pie on this preheated sheet will help to brown that bottom crust very well (no soggy bottoms). It will also catch any drips that might happen. My pies tend to drip some butter from the pastry, and I have smoked out my kitchen more than once before I finally gave in and started this trick, and I’m truly glad I did.


I am so happy with how this recipe turned out. I love the flavors that come out from the cherries, the warm from the cinnamon and the interest of the almond. I truly hope that you will try it and let me know how it goes. Remember you don’t have to be a pro to make magic in your kitchen!
Joe the Blue Wizard

Cherry Pie
Ingredients
- 2 lb (0.9 kg) Frozen Dark Sweet Cherries
- 1/2 cup (100 g) Granulated Sugar
- 3 tbsp. (22.5 g) Corn Starch
- 1 pinch Cinnamon
- Juice of 1 Lemon
- 1/2 tsp. (2.5 mL) Almond Extract
- 2 sticks (220 g) Unsalted Butter
- 2 1/2 cups (300 g) Flour (plus more for rolling)
- 1/4 cup (50 g) Sugar (plus more for sprinkling)
- 2 pinches Kosher Salt
- 1/2-3/4 cup (120-180 mL) Ice Water
- Milk for brushing
Instructions
- In a small bowl whisk together sugar and corn starch until combined.
- In a wide, shallow pan add the cherries, sugar and corn starch mixture, lemon juice and cinnamon.
- Place the pan over medium heat and cook until the cherries have defrosted and have given up their juice.
- Increase heat to high and once mixture starts to boil, stir constantly until a spoon leaves a trail when dragged across the bottom of the pan.
- Remove from heat and mix in the almond extract.
- Allow to cool to room temperature.
- Grate butter on the large holes of a box grater.
- Spread evenly across a plate and freeze for 15 minutes.
- In a large bowl, whisk together flour, sugar, and salt.
- After butter has chilled add it to the dry ingredients and toss to coat the butter.
- Add about 1/4 cup of ice water, and mix until water is absorbed.
- Add another 1/4 cup of ice water and mix in the same way.
- Switch to your hands and knead the dough into a shaggy ball, adding a small amount more water if necessary.
- Divide dough into two flat discs, wrap separately and place in the refrigerator for at least a half hour or overnight.
- On a floured surface roll out one pastry disc to a 12 inch diameter.
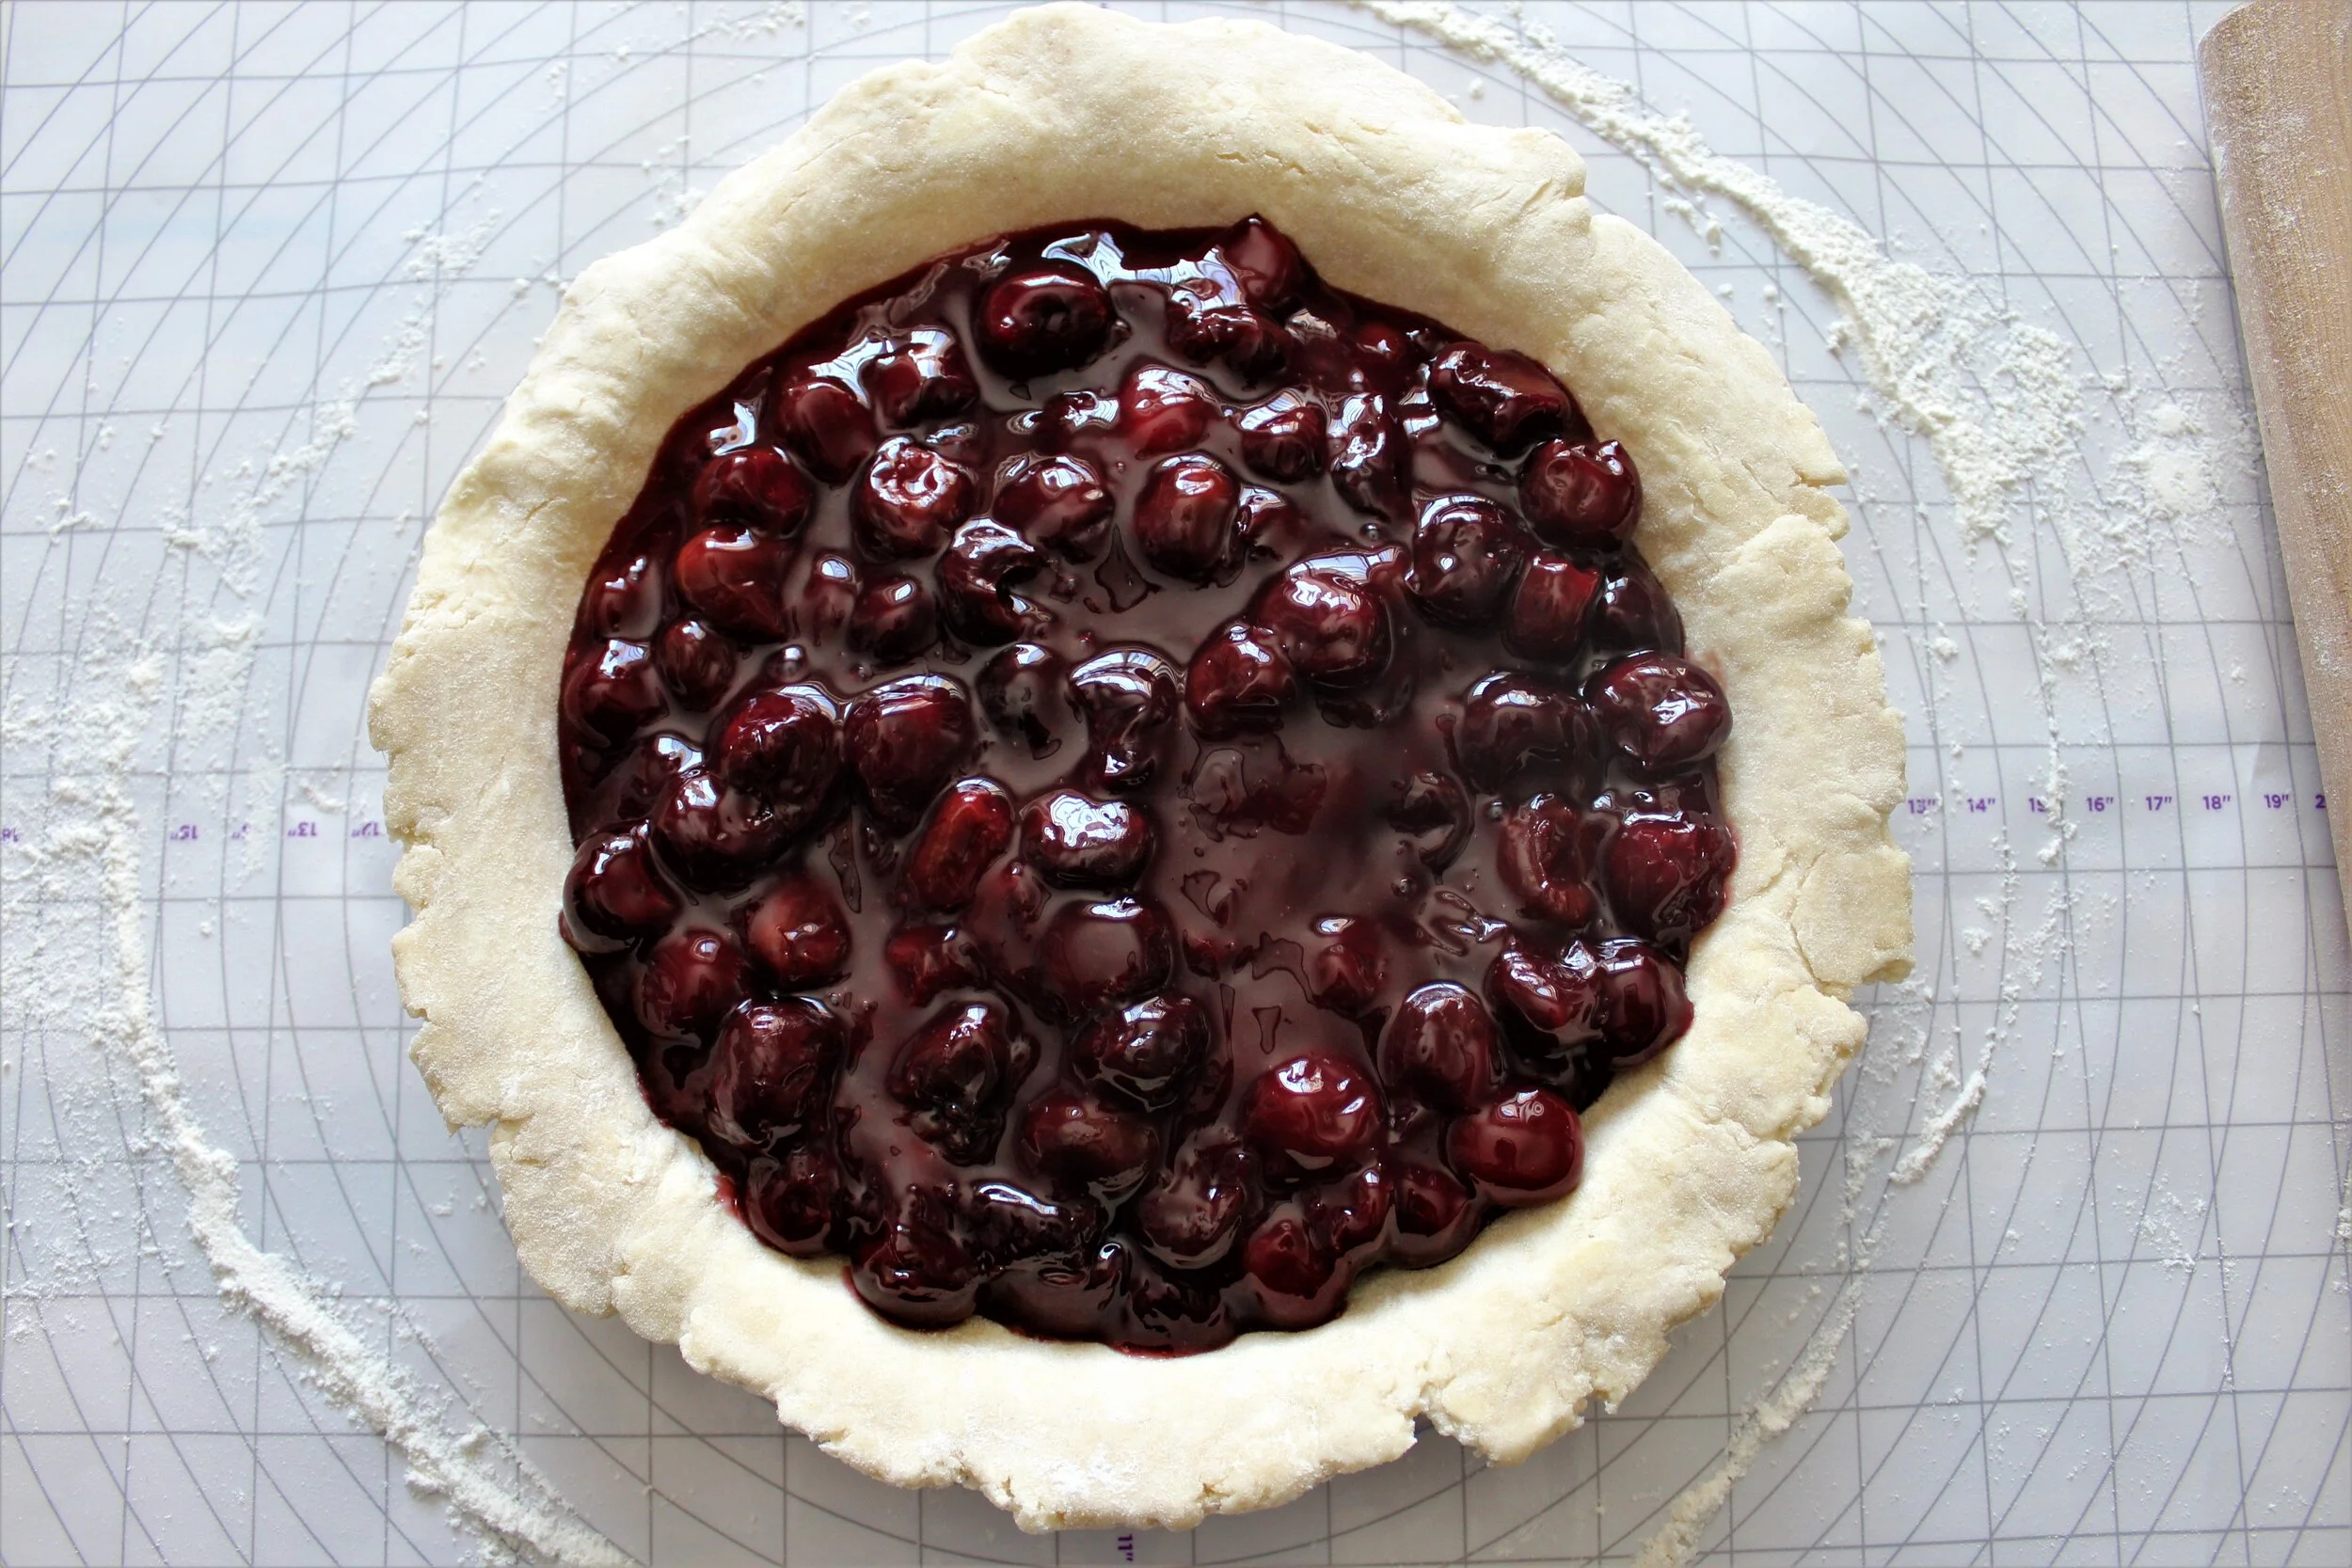
- Place in a pie plate and press in, there will be overhang.
- Add cooled filling to the bottom crust.
- On a floured surface roll out the other pastry disc to a 10 inch diameter.
- Cut out 1 one-inch hole in the very center of this dough.
- Cut 6 one-inch holes surrounding the center hole.
- Place top crust, centered over the remainder of the pie.
- Remove any excess pie dough from the edges of the pie. You should have no more than a quarter inch overhang.
- Tuck the edge of the top crust under the edge of the bottom crust all the way around the edge of the pie.
- Crimp edge by using the thumb and forefinger of one hand and the thumb of another (see video for visual).
- Chill pie in the freezer for 15 minutes.
- Meanwhile pre-heat oven to 400 degrees F with a sheet pan on the bottom rack.
- Once the pie is chilled, remove from the freezer and brush the top with milk. Then sprinkle with sugar.
- Place the pie into the oven on the sheet pan and bake for 45-50 minutes or until the crust is golden brown all over.
- Cool to desired temperature and enjoy!